Showing posts with label tutorial. Show all posts

Sunday, May 23, 2010

Tutorial: Applique Fun!

I love to sew, and one of my favorite things to do with a sewing machine is to applique. I haven't been taught professionally or anything. I just came up with my own method, and I think it's pretty simple. It just takes a few steps to create artwork out of fabric!

Materials
Different fabrics
Iron-on adhesive
Sewing machine with zigzag option
Thread


Step 1
Decide on the design you want to create with fabric. Once you pick a design, cut out each piece of the drawing. Each piece will be a separate piece of fabric. (To avoid spaces appearing between the pieces in the finished product, plan for some pieces to overlap.)
Step 2
Iron on the adhesive to the backs of the fabrics that will make up the appliqued design. (I use Heat N' Bond Lite.) Then, trace around your cut-out pieces on the adhesive paper. Be sure to trace the pieces upside-down, since your fabric is currently upside-down.

Step 3
Once you have traced around each piece, cut them out. Then, pull away the paper backing from each one.


Step 4
Now arrange the pieces to create your design. Once you are pleased with the arrangement, iron them down. Adjust the iron depending on the type of fabric you use. With about 10 seconds of heat, your pieces will be attached to the background. Pieces cannot be rearranged, so be careful!


Step 5
Sew around each piece using a zigzag stitch to secure the pieces in place. Knot the thread on the back, and you're done!


Here's my finished owl pillow!


Tip: If you don't trust your drawing abilities, you can always find a picture to use as a guide. Drawings from coloring books make great applique patterns too!

Applique is a great way to personalize all kinds of items. Here are a few items from my etsy shop that utilize this technique!

Friday, April 30, 2010

What's in a Card? ...Business Cards, that is.

The options for business cards are endless, but most Etsians can agree on one fact: Business cards are an important tool for promotion.

I've asked people in forums and gathered information on the best tricks and tips for creating business cards. With so many available avenues, it's really up to you as a seller to decide which is best for your shop. I hope you can use this as a guide for creating your next (or first) business cards!

Where you get your cards printed can determine what your card can look like, so I'll go over the most popular options for printing.


Moo

Photo courtesy of Heather King Photography


By far the most praised option, Moo prints photos of your items from Etsy. It's super simple. You tell Moo your shop name, Moo retrieves the photos, and tah-dah... stunning cards. You can then decide what information you want included on the back.

Moo isn't the cheapest option, but those who use it say they are complimented all the time on their cards. Showing your product is a major plus when promoting your shop.

Additionally, Moo MiniCards are great to use as tags on items.

If you hurry, Moo is offering 50 free business cards (just pay shipping). Click here for details. This offer ends April 30th.


VistaPrint


One of the most popular choices for its ease and cost, VistaPrint has tons of business cards templates, ready to use. You can search for the type of look you want or the type of business. For instance, I found this owl template for the card above, which was perfect for my shop.

VistaPrint is great if you are starting out and don't want to spend much.
You get a professional look without breaking the bank. If you create an account with VistaPrint, they will send you emails regularly with free offers. You can get 250 business cards, and only pay the shipping. They offer similar deals with magnets, postcards, and more.

Also, you can upload your own design to VistaPrint for a customized business card. You do have to pay for the upload (unless you get a free upload email!), but the overall cost is still quite low.


Make Your Own

Photo Courtesy of Crown Bindery


Making your own business cards is a great option. It's a sure way to make your cards one-of-a-kind, and it can be inexpensive if you are thrifty. You can see a video here of how Crown Bindery creates the cards shown above.

Be creative! Having a different shape (like circle) is a good way to stand out. Making your own is certainly a great option if you are a new shop and are not ready to commit to ordering in bulk. Making your own means you can change the design whenever, which is great if you are indecisive!


Other Options

Other sites that Etsy sellers have mentioned as favorites for printing include these:

Overnight Prints
IprintSmall Business Printing
123Print
Business Card Makers on Etsy
And local printers


Tips & Tricks


Make your business card go the extra mile. Some advice I have gathered included ...

Double the use of your business card as a thank-you card. Write a little note to customers on the back to add a personal touch.

If you have two shops, print one shop on each side of the business card.

Anytime someone asks for your email or phone number, use your business cards.

At craft shows, hand out flyers, magnets, or postcards in addition to business cards. (cr8tivity is a great site with tools to create great-looking flyers.)


Thank you to everyone who contributed to this post. I appreciate your input!

Tuesday, March 23, 2010

Tutorial: How to make good-looking banners, buttons, backgrounds and more!

Making banners and buttons can be difficult, especially if you don't have a fancy program to use.

If you have an etsy shop, a pretty banner is a great way to welcome customers. When I first opened Owlsome Gifts, I had little banner-making experience. This was my first one:


Simple and not so eye-catching. That's about what you can expect working with a Paint program.

I think my banner now is a pretty big improvement...


I'm not saying I have the best banner in the world now, but my banner skills have greatly improved with a simple online program: PICNIK!!

It's free and you don't have to download anything to use. So, here's what to do to create a masterpiece! (I'm using my twitter background as an example.)

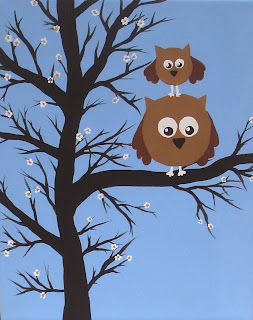
Step 1: Go to the site, and upload a photo. I'll be using this owl painting from my shop.


Step 2:
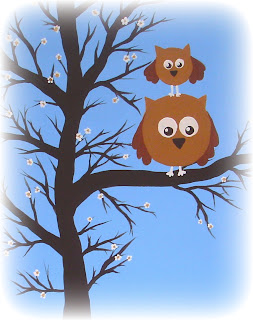
Adjust the colors, and crop it to the correct proportions using the controls at the top.

Step 3:
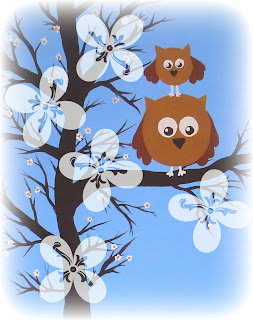
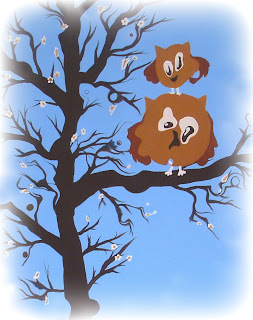
Click the "Create" tab. Here you can add a frame, play with different effects, and add stickers.

Matte Effect...


Stickers...


Gooify...


Step 4: Add text! Check out all the fonts... so much fun!


Step 5: Save the image. Be sure to select the correct format (probably jpg). And, adjust the size for your purpose. Picnik will preserve the quality of your image even when you reduce the size. Paint and other programs sometimes give you a fuzzy effect when you reduce the size.

It's a great program, and I use it for all my banners, buttons, backgrounds,... everything! Let me know if you use it (or if you're gonna start using it)!

Wednesday, January 27, 2010

Tutorial: How to Burn Polymer Clay

This is a great way to really ruin a project.

What you will need:
Polymer Clay
An oven


Step 1: Spend time shaping and molding the polymer clay until you have created a masterpiece.
Step 2: Accidentally set your oven on a very high temperature. Place polymer clay on a baking sheet inside the oven.
Step 3: Wait until you smell something odd... kinda like burnt plastic.
Step 4: Rush to the oven to retrieve your work. It should be a nice shade of brown or black, and perhaps misshapen.


Ha ha... I thought I would share this tutorial as a warning to what happens when polymer clay is overheated.

That last photo is actually of 2 little pulls or keychains I was making. They started out as nice little circles with letters imprinted. Oh, and they were bright purple and blue. Then, I thought my oven had cooled enough after I had baked some food, so I put the polymer clay in. Well, in about 10 minutes, the polymer clay had turned that color and smelled really bad. And, one of the pieces blew up in size... not sure why just one did.

Anyway, be careful when you bake polymer clay.